Last updated: May 14, 2026
Quick Answer
Elementor v4 is the biggest architectural shift in the plugin’s history, replacing widget-only styling with a class-based design system that includes States, Local Classes, and Class Indicators. This guide walks you through every major feature, from installation to advanced AI-assisted layouts, so you can build faster, cleaner WordPress sites. Whether you’re upgrading from an older version or starting fresh, mastering Elementor v4 means learning containers, Atomic Forms, and the new classes workflow.
Key Takeaways
- Elementor holds roughly 43% of the WordPress page builder market as of May 2026, down from 56% in 2024 but still the dominant choice [10].
- Editor V4 introduces a classes system with States, Local Class, and Class Indicators, bringing Figma-like styling control to WordPress.
- Flexbox containers replaced sections and columns as the default layout method, and a stability patch in v4.0.4 fixed critical rendering issues [2].
- Atomic Forms break form widgets into individual, class-driven components (inputs, labels, wrappers, error messages) for full design control.
- AI Copilot and AI Layouts can now generate entire sections from text prompts and reference URLs.
- Security risks come mostly from third-party addons, not Elementor core. Happy Addons had a critical vulnerability patched in March 2026 [4].
- Performance still requires deliberate optimization: lazy loading, asset minimization, and container-based layouts all matter.
- Elementor Pro starts at $59/year for one site; the free version covers basic design needs.
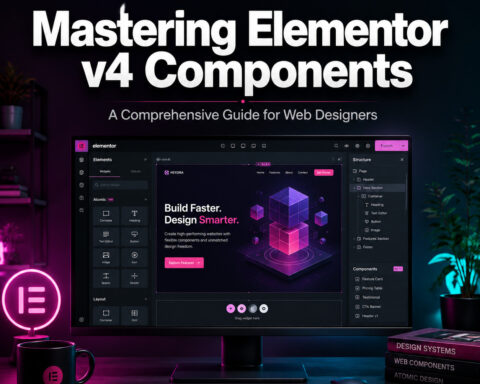
 conceptual illustration showing the Elementor v4 editor interface evolution, split-screen comparison with old widget](https://zsxkvszxbhpwnvzxdydv.supabase.co/storage/v1/object/public/generated-images/kie/49820662-1107-4ea5-9cde-87762baa4dd0/slot-1-1778722494118.png))
What Changed in Elementor v4 and Why Does It Matter?
Elementor v4 is not a minor update. It’s a fundamental rethinking of how the editor handles styling, layout, and forms. The shift from a widget-centric model to a class-based design system changes daily workflows for every Elementor user.
Here’s what’s actually different:
The Classes System Before v4, styling an element meant editing its individual settings. If you wanted the same button style on 40 pages, you either used Global Widgets (clunky) or manually copied settings. Now, v4 introduces:
- States: Define hover, focus, and active styles directly in the editor without custom CSS
- Local Class: Give unique styling priority to a specific element when it needs to override a shared class
- Class Indicators: Visual badges that show where a style comes from, so you can trace inheritance at a glance
This is closer to how professional tools like Figma handle design tokens. If you’re familiar with Figma’s approach to design systems and UI kits, Elementor v4’s classes will feel intuitive.
Atomic Forms The old form widget was a monolith: one big block with limited styling options. Atomic Forms break every form into individual pieces (input fields, labels, wrappers, error messages), each controlled by the same class/variables system as other elements. You get full design control and better performance.
Stability Note: The initial v4.0 rollout caused Flexbox and Div Block layouts to break for certain display values. Elementor Pro 4.0.4, released April 28, 2026, patched these rendering issues [2]. If you’re upgrading, make sure you’re on at least v4.0.4 before going live.
“Editor V4 positions Elementor as a more granular, Figma-style editor instead of a widget-only tool.
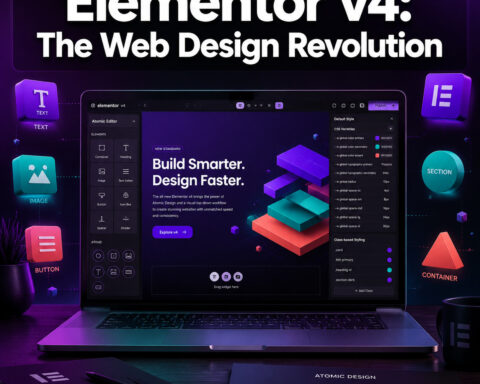
step-by-step visual workflow diagram showing Elementor v4 installation and setup process as a vertical flowchart. Five](https://zsxkvszxbhpwnvzxdydv.supabase.co/storage/v1/object/public/generated-images/kie/49820662-1107-4ea5-9cde-87762baa4dd0/slot-2-1778722486627.png))
How Do You Install and Set Up Elementor v4 from Scratch?
Start with a clean WordPress installation, install the Elementor plugin, and pair it with the Hello Theme for the lightest foundation. The entire setup takes under 10 minutes.
Step-by-Step Installation
Choose your hosting: Any WordPress-compatible host works. Managed WordPress hosts (like Cloudways, SiteGround, or Kinsta) tend to give better performance out of the box.
Install WordPress: Most hosts offer one-click WordPress installation. Use the latest stable version (6.x as of 2026).
Install the Hello Theme: Go to Appearance > Themes > Add New, search “Hello Elementor,” and activate it. This theme is purpose-built to be a blank canvas for Elementor. If you want deeper control over theme structure, our guide to custom WordPress theme development covers that process.
Install Elementor: Go to Plugins > Add New, search “Elementor,” and install the free version. For Pro features (Theme Builder, WooCommerce widgets, AI tools), purchase and upload the Pro plugin separately.
Configure Global Settings: Before building anything, set your global colors, fonts, and default container widths under Elementor > Settings > Style. In v4, these globals feed into the new classes system, so getting them right early saves hours later.
Verify your version: Go to Elementor > System Info and confirm you’re running at least v4.0.4. Earlier 4.0.x versions had layout rendering bugs [2].
Choose Elementor If…
| Your Situation | Elementor v4 | Alternative |
|---|---|---|
| Non-developer wanting design control | Best fit | Consider Divi for budget |
| Developer-led team | Workable but heavy | Bricks is faster/cleaner |
| Performance-obsessed minimalist | Requires optimization work | Gutenberg (Block Editor) |
| Multi-site agency on a budget | Pro pricing adds up | Divi lifetime license ($249) |
| AI-assisted design workflow | Strong native AI | No direct competitor yet |
This comparison aligns with broader 2025–2026 analyses that position Elementor as ideal for designers and content creators, while Gutenberg suits minimalists and Bricks serves developer-led teams [7]. For a wider view of builder options, see our review of the best drag-and-drop website builders.
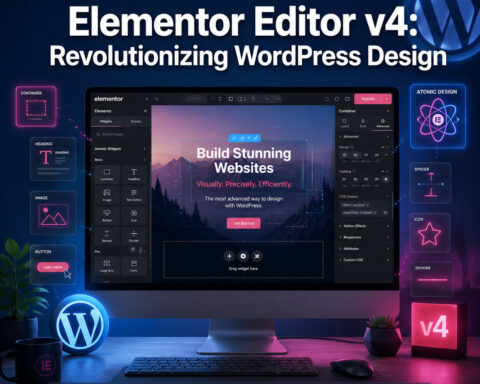
detailed close-up illustration of Elementor v4 Flexbox container system showing nested containers in a visual hierarchy.](https://zsxkvszxbhpwnvzxdydv.supabase.co/storage/v1/object/public/generated-images/kie/49820662-1107-4ea5-9cde-87762baa4dd0/slot-3-1778722491968.png))
How Do Containers and Flexbox Layouts Work in Elementor v4?
Containers are the foundation of every Elementor v4 layout. They replace the old Section > Column structure with a single, flexible element that uses CSS Flexbox (or Grid) for positioning.
Why Containers Are Better
- Fewer DOM elements: A container-based layout generates less HTML than the old section/column model, which means faster page loads
- Nesting without limits: You can nest containers inside containers to create complex layouts without workarounds
- True responsive control: Set different flex directions, gaps, and alignment per breakpoint (desktop, tablet, mobile)
- CSS Grid support: For two-dimensional layouts (rows and columns simultaneously), containers now support Grid alongside Flexbox
Building Your First Container Layout
- Open any page with Elementor, and drag a Container widget onto the canvas
- Set the Flex Direction: Row (horizontal) or Column (vertical)
- Adjust Gap to control spacing between child elements
- Set Alignment (justify-content and align-items) to position children within the container
- Add child elements: text, images, buttons, or nested containers
- Switch to tablet/mobile breakpoints and override any settings that need to change
Common mistake: Wrapping every single element in its own container. This creates unnecessary nesting and bloated HTML. Use containers for layout groups, not individual elements. A heading and paragraph that sit together don’t each need their own container.
Edge case: If you’re migrating from an older Elementor site that uses sections and columns, don’t convert everything at once. Test the container conversion on a staging site first. The v4.0.0 to v4.0.3 releases had Flexbox rendering bugs that could break existing layouts [2].
For responsive design principles that translate well to Elementor’s container system, our Figma mobile grid design guide covers the underlying concepts.
How Do You Use the New Classes System for Mastering Elementor v4?
The classes system is the single most important workflow change in Elementor v4. It lets you create reusable style definitions, apply them across elements, and manage visual consistency from one place.
Classes, States, and Local Overrides Explained
Global Classes work like CSS classes: define a style once (font size, color, padding, border), name it something descriptive like “primary-button” or “card-container,” and apply it to any element. Change the class definition, and every element using it updates instantly.
States let you define styles for interactive conditions:
- Hover: What happens when a user’s cursor is over the element
- Focus: What the element looks like when selected (critical for form inputs and accessibility)
- Active: The style during a click or tap
Before v4, achieving hover effects required custom CSS or third-party plugins. Now it’s built into the visual editor.
Local Class is your override tool. When one specific button needs to be red instead of blue while keeping everything else from its global class, a Local Class gives it priority without breaking the shared style.
Class Indicators are small visual badges in the editor that show which class is applied to an element and where the style originates. This solves the “why does this look like that?” problem that plagued complex Elementor builds.
Practical Workflow
- Before building pages, define your core classes: heading styles, body text, button variants, card layouts, spacing utilities
- Apply classes to elements instead of editing individual style tabs
- Use States for all interactive elements (buttons, links, form fields)
- Reserve Local Class for genuine one-off exceptions
- Use Class Indicators to audit your pages and catch inconsistencies
This approach mirrors how professional design systems work. If you’ve used Figma’s component and style organization methods, you’ll recognize the pattern.
creative visualization of Elementor AI features in action. A laptop screen shows the Elementor editor with an AI Copilot](https://zsxkvszxbhpwnvzxdydv.supabase.co/storage/v1/object/public/generated-images/kie/49820662-1107-4ea5-9cde-87762baa4dd0/slot-4-1778722525026.png))
What Can Elementor AI Actually Do in 2026?
Elementor AI is a native layer inside the editor that handles text generation, image creation, code writing, container layout generation, and site planning. It’s not a gimmick, but it’s also not a replacement for design skill.
Current AI Capabilities
- AI Text: Generate or rewrite headlines, paragraphs, and CTAs directly in any text widget. Useful for first drafts, not final copy.
- AI Images: Create custom images from text prompts without leaving the editor. Quality varies; best for placeholder and concept images.
- AI Code: Write custom CSS, HTML, or JavaScript snippets. Helpful for quick customizations, but always review the output.
- AI Layouts: Generate entire sections from a text prompt. You can also provide a reference URL, and the AI will approximate that layout’s structure.
- AI Copilot: A conversational assistant that suggests design changes, answers Elementor-specific questions, and helps troubleshoot issues.
- AI Site Planner: Outlines a full site structure (pages, sections, content hierarchy) based on your business description.
When AI Helps vs. When It Doesn’t
| Task | AI Useful? | Notes |
|---|---|---|
| Generating a first-draft hero section | Yes | Good starting point, always customize |
| Writing final marketing copy | No | Too generic; needs human editing |
| Creating placeholder images | Yes | Faster than searching stock libraries |
| Building complex nested layouts | Partially | Gets the structure close, details need manual work |
| Custom CSS for specific animations | Yes | Saves time on syntax, verify browser compatibility |
| Full site design from scratch | No | Produces generic results; use for scaffolding only |
For broader context on how AI tools fit into design workflows, our guide to AI graphic design tools covers the landscape beyond Elementor.
Pro Interactions and the Motion Design Roadmap
Elementor’s public roadmap for April 2026 highlights “Pro Interactions” as a key focus area. This signals a move toward built-in motion design (scroll-triggered animations, element transitions, parallax effects) that currently requires third-party plugins or custom code. If you’re building sites that need animation, keep an eye on this feature as it rolls out.
performance optimization dashboard visualization for Elementor v4 websites. A browser window shows Google PageSpeed](https://zsxkvszxbhpwnvzxdydv.supabase.co/storage/v1/object/public/generated-images/kie/49820662-1107-4ea5-9cde-87762baa4dd0/slot-5-1778722470281.png))
How Do You Optimize Elementor v4 Sites for Performance?
Elementor sites can be fast, but they aren’t fast by default. You need to actively configure performance settings and follow container-based best practices to hit good Core Web Vitals scores.
Performance Checklist
- Use containers, not sections: Containers generate cleaner, lighter HTML
- Enable Elementor’s built-in performance features: Go to Elementor > Settings > Performance and enable:
- Improved Asset Loading (loads CSS/JS only for widgets used on each page)
- Lazy Load for images and background images
- Inline Font Icons to reduce HTTP requests
- Minimize third-party addons: Every addon adds CSS and JavaScript. Audit your plugins quarterly and remove anything unused. This also reduces your security attack surface [4].
- Optimize images before uploading: Use WebP format and compress images to under 200KB where possible. Elementor’s built-in image optimizer helps, but dedicated tools like ShortPixel or Imagify do more.
- Use a caching plugin: WP Rocket, LiteSpeed Cache, or W3 Total Cache. Elementor doesn’t include page caching natively.
- Serve from a CDN: Cloudflare (free tier works) or your host’s built-in CDN.
- Avoid excessive nesting: Each unnecessary container adds DOM nodes. Aim for the flattest structure that achieves your layout.
Common Performance Mistakes
- Loading 15+ Google Fonts: Pick 2–3 font families maximum. Host them locally using Elementor’s custom fonts feature.
- Using sliders and carousels everywhere: These load heavy JavaScript libraries. Use them only where they genuinely improve UX.
- Installing 5+ Elementor addon packs: Happy Addons, Essential Addons, Premium Addons, etc. Each one adds weight. Choose one addon pack and use it sparingly.
- Ignoring mobile performance: Test on real devices, not just Chrome DevTools. Mobile connections are slower, and Elementor’s responsive previews don’t simulate network speed.
For WordPress-specific optimization strategies, our guide to WordPress theme customization includes performance-focused configuration tips.
How Do You Keep Elementor v4 Sites Secure?
Elementor core has a reasonable security track record, but the ecosystem of third-party addons is where most vulnerabilities appear. In March 2026, Wordfence documented a critical insecure direct object reference in Happy Addons for Elementor (versions ≤ 3.21.0) that allowed authenticated attackers to access or modify restricted data [4]. Stored XSS vulnerabilities have also been found in other Elementor-related widgets throughout 2026.
Security Best Practices
- Keep everything updated: Elementor core, Pro, all addons, WordPress itself, and your theme. The v4.0.8 release (May 12, 2026) includes the latest compatibility and stability fixes [2].
- Minimize addons: Fewer plugins means fewer potential entry points. If you only need one widget from an addon pack, consider writing custom code instead.
- Use a security plugin: Wordfence or Sucuri for firewall protection and malware scanning.
- Enable two-factor authentication on all admin accounts.
- Run a staging site: Test updates on staging before pushing to production. Elementor version updates can occasionally break layouts, as the v4.0.0 rollout demonstrated [2].
For more on WordPress plugin management and security, see our essential guide to WordPress plugin development best practices.
How Does Elementor v4 Compare to Alternatives in 2026?
Elementor still commands roughly 43% of the WordPress page builder market [10], but the landscape has shifted. About 59.6% of WordPress sites now use a page builder, and rising adoption of the native Block Editor is eating into builder market share overall [10].
Elementor vs. Top Competitors
| Feature | Elementor v4 | Divi | Bricks | Gutenberg |
|---|---|---|---|---|
| Ease of use | Very easy | Easy | Moderate | Easy |
| Design power | Strong | Strong | Strong | Moderate |
| Page speed (default) | Moderate | Moderate | Fast | Very fast |
| AI features | Native, extensive | Limited | None | Basic |
| Pricing (1 site/year) | $59 (Pro) | $89/yr or $249 lifetime | $79/yr | Free (core) |
| Class-based styling | Yes (v4) | No | Yes | No |
| Market share | ~43% | ~15% | ~3% | Growing (native) |
| Best for | Designers, creators | Budget multi-site | Developer teams | Minimalists |
Choose Elementor v4 if you want the largest ecosystem, native AI tools, and a visual-first workflow with the new classes system.
Choose Divi if you manage many sites and want a lifetime license to reduce long-term costs.
Choose Bricks if you’re a developer who prioritizes clean code output and performance over visual convenience.
Choose Gutenberg if you want the fastest, lightest option and don’t need advanced design features.
A 2025 market share analysis credits features like Flexbox containers, custom code, and loop builders as key drivers of Elementor’s continued dominance [7]. Even with its market share declining from 56% to 43%, Elementor remains “larger than the next several competitors combined” [7].
Mastering Elementor v4: The Ultimate Step-by-Step Web Design Guide for 2024 — Putting It All Together
Here’s a condensed workflow for building a complete site with Elementor v4:
- Plan your site structure: Use AI Site Planner for a starting framework, then refine manually
- Set up globals: Define colors, fonts, and spacing variables before touching any page
- Create your class library: Build reusable classes for headings, body text, buttons, cards, and containers
- Build your Theme Builder templates: Header, footer, single post, archive, 404 page
- Design page by page: Use containers for layout, classes for styling, AI for first drafts
- Add interactions: Hover states via the States system, scroll animations when Pro Interactions ships
- Optimize performance: Run through the performance checklist above
- Audit security: Remove unused addons, update everything, install a security plugin
- Test on real devices: Check every breakpoint on actual phones and tablets
- Launch and monitor: Use Google Search Console and PageSpeed Insights to track performance post-launch
Frequently Asked Questions
Is Elementor v4 free? The core Elementor plugin is free and includes the new container system and basic widgets. The classes system, AI tools, Theme Builder, and advanced widgets require Elementor Pro, starting at $59/year for one site.
Can I upgrade from Elementor v3 to v4 safely? Yes, but test on a staging site first. The initial v4.0.0 release had Flexbox rendering issues that were fixed in v4.0.4 [2]. Back up your site before upgrading.
Do I need the Hello Theme to use Elementor? No, but it’s strongly recommended. Hello Theme is a minimal blank canvas that avoids style conflicts. Other themes work but may add unnecessary CSS that interferes with your designs.
How much does Elementor Pro cost in 2026? Plans start at $59/year for one site. The Expert plan (25 sites) is $199/year. There is no lifetime license option, unlike Divi’s $249 one-time payment.
Is Elementor bad for SEO? Not inherently. Elementor outputs standard HTML that search engines can crawl. Performance is the main SEO concern: slow sites rank lower. Follow the performance optimization steps in this guide to keep load times competitive.
What happened to sections and columns? They still exist for backward compatibility, but containers are the default in v4. New sites should use containers exclusively. Elementor provides a conversion tool for migrating old layouts.
Are Elementor addon plugins safe to use? Many are, but they’re the primary source of security vulnerabilities in the Elementor ecosystem. The Happy Addons critical vulnerability in March 2026 is a recent example [4]. Only install addons you actively use, and keep them updated.
What are Atomic Forms? A new form architecture in v4 that breaks forms into individual, class-controlled components (inputs, labels, wrappers, error messages) instead of one monolithic widget. This gives full styling control and better performance.
Can Elementor AI build an entire website? It can generate a site scaffold (structure, placeholder content, basic layouts), but the output is generic. Use AI for speed on the first draft, then customize everything manually for a professional result.
Does Elementor v4 work with WooCommerce? Yes. Elementor Pro includes WooCommerce-specific widgets and the ability to design custom product pages, shop archives, and cart/checkout pages using the Theme Builder.
How does the Loop Builder work? Loop Builder lets you design a template for repeating content (blog posts, products, team members) and apply it to dynamic queries. Combined with v4’s classes system, you can create consistent, maintainable listing layouts.
Is Elementor still the most popular page builder? Yes. Despite declining from 56% to roughly 43% market share among page-builder-using WordPress sites, Elementor remains the dominant choice by a wide margin [7][10].
Conclusion
Mastering Elementor v4 in 2026 means learning three things well: containers for layout, classes for styling, and the AI tools for speed. The shift from widget-based editing to a class-driven system is the most significant change Elementor has made, and it rewards designers who invest time in setting up proper globals and reusable classes before building pages.
Your next steps:
- Install Elementor v4.0.8 (or the latest stable release) on a staging site
- Spend 30 minutes setting up global colors, fonts, and your first five classes
- Build one page using only containers and classes, with no individual element styling
- Test AI Copilot on a section you’d normally build manually and compare the time savings
- Run PageSpeed Insights and address any performance issues before going live
The learning curve is real but manageable. Most users report feeling comfortable with the new workflow within a week of daily use. Start small, build systematically, and let the classes system do the heavy lifting.
References
[2] Changelog – https://elementor.com/pro/changelog/ [4] Happy Addons For Elementor 3210 Insecure Direct Object Reference To Authenticated Contributor Post Duplication Via Post Id Parameter – https://www.wordfence.com/threat-intel/vulnerabilities/wordpress-plugins/happy-elementor-addons/happy-addons-for-elementor-3210-insecure-direct-object-reference-to-authenticated-contributor-post-duplication-via-post-id-parameter [7] Elementor Market Share Page Builder Dominance In 2025 – https://searchreplaceplugin.com/blog/elementor-market-share-page-builder-dominance-in-2025/ [10] WordPress Statistics – https://www.wpzoom.com/blog/wordpress-statistics/