Last updated: May 13, 2026
Quick Answer: Elementor AI lets WordPress designers generate complete page sections, write copy, produce images, and deploy changes to live sites directly from the Elementor editor using natural language prompts. With the 2026 introduction of Angie, Elementor’s agentic AI, the tool now handles complex multi-step tasks like building headers, hero sections, and menus from a single command, cutting wireframing time by up to 60% according to Elementor’s own reporting [4]. This guide covers everything you need to start using these features effectively, even if you’ve never touched an AI tool before.
Key Takeaways
- Elementor AI generates full website sections (headers, hero areas, content blocks) from text prompts inside the editor [1].
- Angie, Elementor’s agentic AI, uses the Model Context Protocol to understand your site’s existing theme, plugins, and architecture before making changes [3].
- One-click deployment pushes AI-generated designs to your live WordPress site without manual export steps [2].
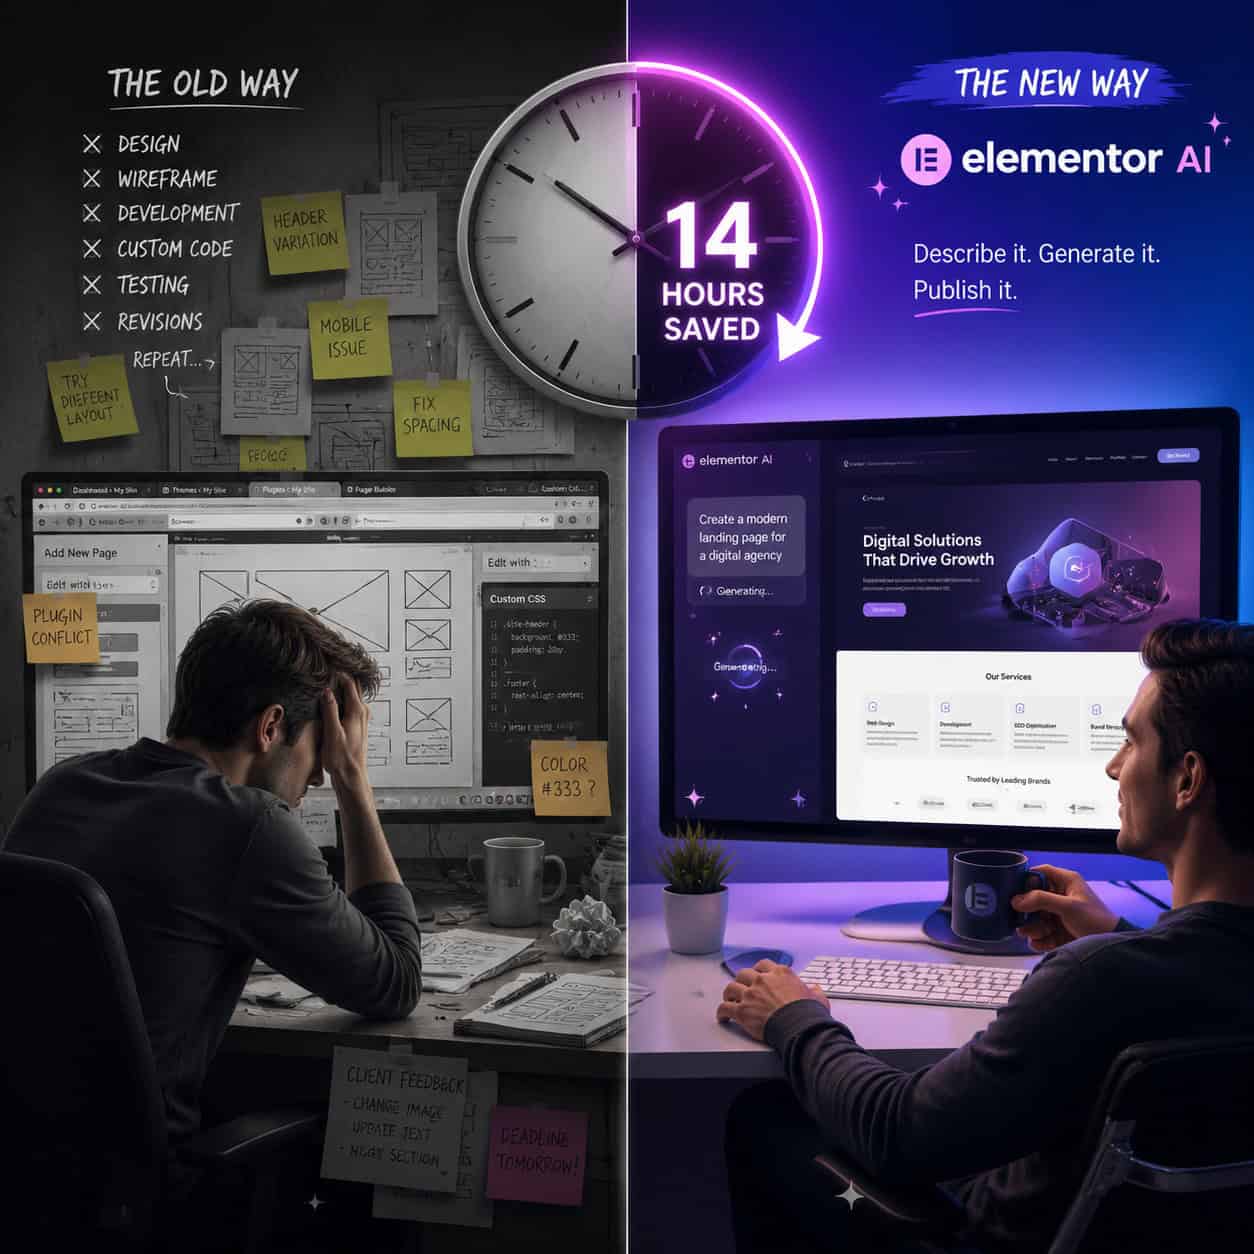
- Figma-to-Web AI workflows save an estimated 14 hours per client project by automating wireframe-to-build conversion [4].
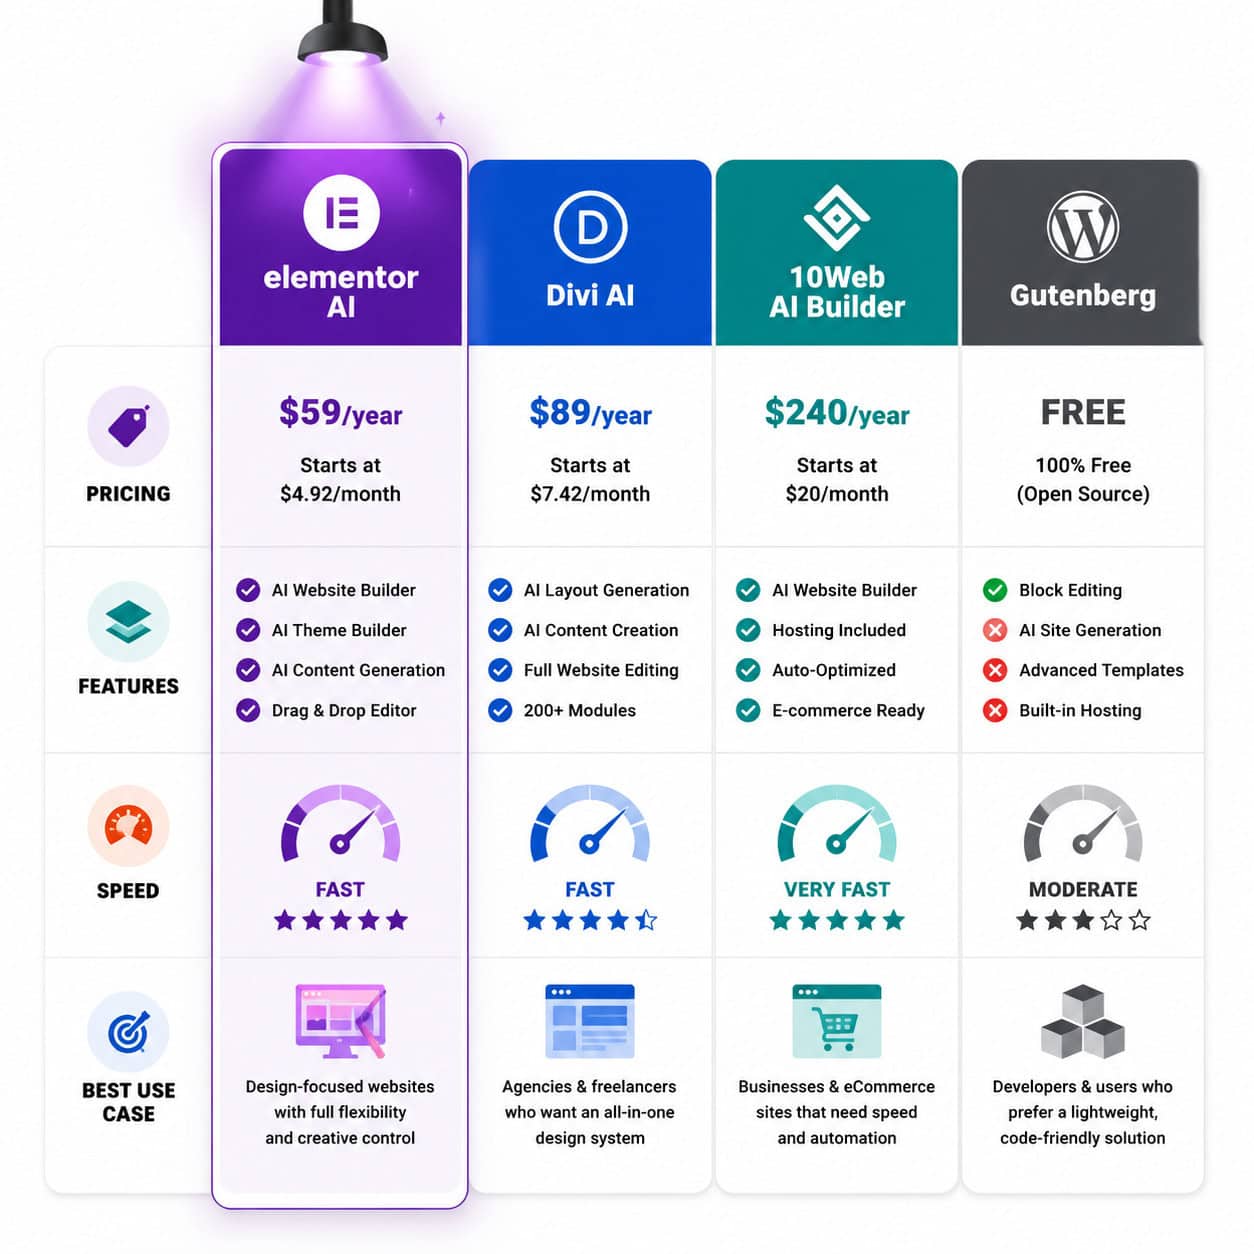
- Pricing starts at $48/year on a credit-based system for users already in the Elementor ecosystem.
- AI won’t replace designers, but designers who refuse to adapt will fall behind those who use AI to handle repetitive tasks [3].
- Alternatives exist: Divi AI, 10Web AI Builder, and Gutenberg each serve different needs and budgets.
- Performance trade-offs matter: Elementor adds page weight, so you should test Core Web Vitals after AI-assisted builds.
What Is Elementor AI and How Does It Work?
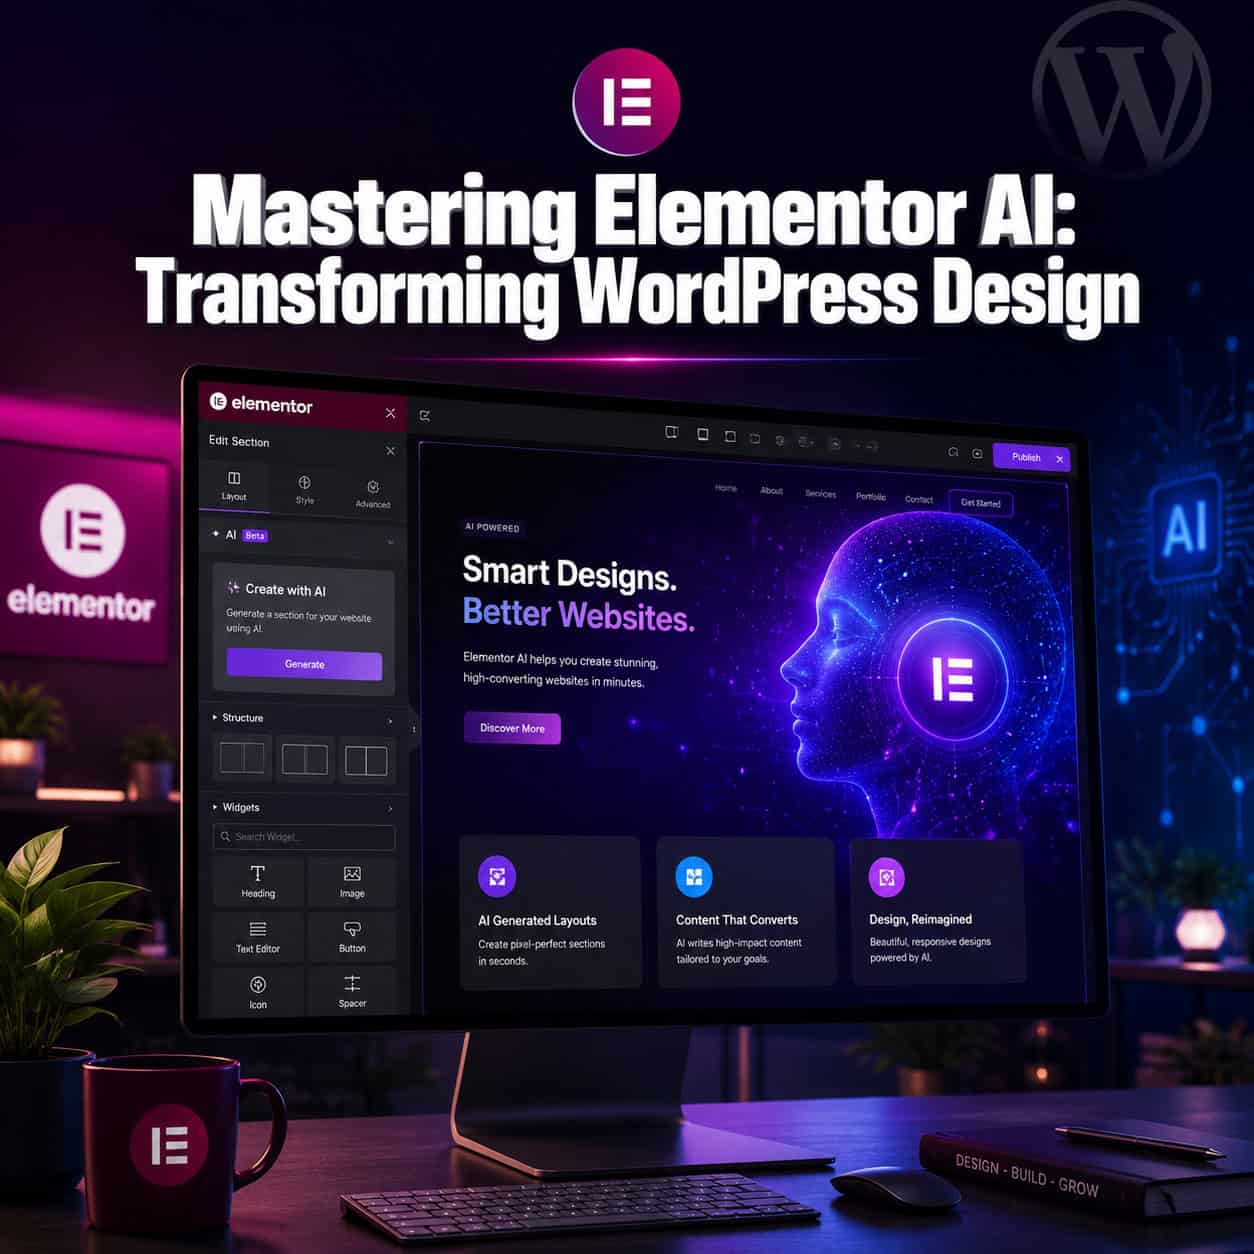
Elementor AI is a built-in artificial intelligence layer inside the Elementor page builder that generates text, images, CSS code, and complete layout sections from natural language prompts. You don’t need a separate plugin or third-party API key to use it.
Here’s how the core features break down:
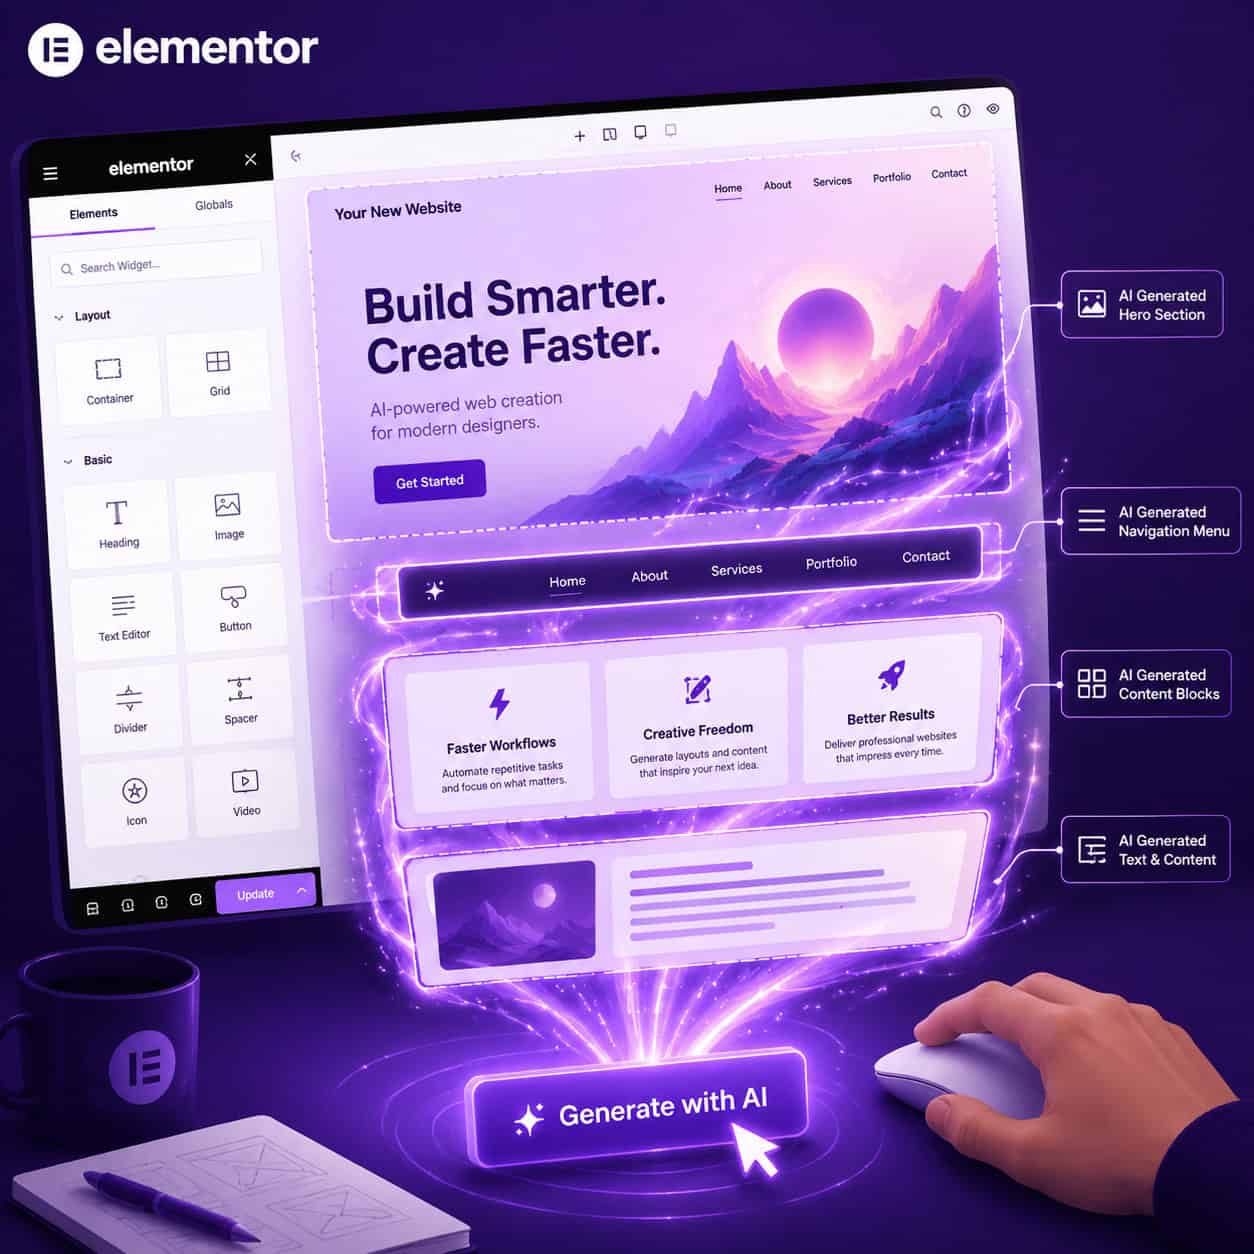
- Generate with AI button: Appears next to text fields, image placeholders, and section controls throughout the editor. Click it, type what you want, and the AI produces a draft [1].
- Section generation: Describe a section (e.g., “a pricing table with three tiers and a highlighted popular plan”), and Elementor builds it with real widgets, styling, and placeholder content [1].
- Context-aware text editing: The AI reads surrounding content on your page and adjusts tone, length, and vocabulary to match. You can ask it to shorten, expand, make more formal, or rewrite for a specific audience.
- CSS code generation: Describe a visual effect (“add a gradient border that transitions from purple to blue on hover”), and the AI writes the custom CSS and applies it.
- Image generation: Create original images from text descriptions without leaving the editor.
The system works because Elementor’s AI inherits context from your existing page structure. It doesn’t generate designs in a vacuum. It reads your current layout, active theme, and widget configuration before producing output [5].
Common mistake: Treating Elementor AI like ChatGPT. It’s not a general-purpose chatbot. Prompts work best when they reference specific Elementor elements (sections, columns, widgets) rather than abstract concepts.
How Does Mastering Elementor AI Transform Your WordPress Design Workflow?
Mastering Elementor AI: A Comprehensive Guide to Transforming WordPress Design Workflow starts with understanding where AI saves the most time. The biggest gains come from three areas: initial layout creation, content drafting, and responsive adjustments.
Time savings by task
| Task | Traditional Time | With Elementor AI | Estimated Savings |
|---|---|---|---|
| Hero section layout | 45–60 min | 5–10 min | ~80% |
| Writing page copy (1 page) | 1–2 hours | 15–30 min | ~70% |
| Custom CSS effects | 20–40 min | 2–5 min | ~85% |
| Full wireframe to build | 14+ hours/project | ~6 hours/project | ~60% [4] |
| Responsive tweaks | 30–60 min | 10–15 min | ~70% |
These numbers come from Elementor’s 2026 reporting on Figma-to-Web AI workflows [4]. Your actual results will vary based on project complexity and how specific your prompts are.
Where AI fits in the design process
- Discovery and wireframing: Use AI to generate rough section layouts from client briefs. This replaces blank-canvas paralysis with a starting point you can refine.
- Content creation: Generate placeholder copy that’s close to final quality, then edit for brand voice. This is especially useful if you’re a designer who struggles with copywriting.
- Styling and polish: Ask the AI for CSS animations, color adjustments, or typography pairings instead of searching Stack Overflow.
- Deployment: Angie can push changes to your live site with one click [2], which eliminates the staging-to-production bottleneck for smaller updates.
If you’re also working with design tools like Figma before building in WordPress, check out our guide on Figma-to-code plugins that streamline design-to-development workflows.
What Is Angie, and How Does Elementor’s Agentic AI Differ from Basic AI?
Angie is Elementor’s agentic AI assistant, introduced in 2026. Unlike the basic “Generate with AI” button that handles single tasks, Angie executes multi-step workflows from a single prompt.
The key difference: basic AI generates one thing at a time (a text block, an image, a section). Angie chains actions together. Tell Angie “build a complete landing page for a SaaS product with a hero section, three feature cards, a testimonial slider, pricing table, and a CTA footer,” and it generates all of those sections in sequence, styled consistently [8].
How Angie works under the hood
Angie uses the Model Context Protocol (MCP) to read your WordPress environment before acting. This means it understands:
- Your active theme and its design tokens (colors, fonts, spacing)
- Installed plugins and their capabilities
- Existing site architecture (pages, menus, categories)
- Your Elementor global settings and saved templates [3]
This context awareness prevents the common AI problem of generating designs that clash with your existing site. Angie produces output that fits your brand because it reads your brand settings first.
What Angie can do in 2026
- Generate complete page layouts from natural language descriptions
- Build and configure navigation menus
- Create hero sections with appropriate imagery and copy
- Handle ongoing site management tasks (updating content, adjusting layouts) [8]
- Deploy changes directly to your live WordPress site [2]
Choose Angie if: You’re building complete pages or managing multiple client sites and want to reduce repetitive setup work. Stick with basic AI if: You only need occasional help with individual text blocks or images.
For a broader look at AI tools that assist with WordPress management, see our roundup of 12 best AI plugins for WordPress website automation.
Step-by-Step: How to Use Elementor AI to Build a Page from Scratch
Here’s the practical workflow I recommend for building a complete page using Elementor AI. This process works for landing pages, service pages, and portfolio pages.

Step 1: Set up your global settings first
Before you touch AI, configure your Elementor global settings:
- Global colors: Set your primary, secondary, text, and accent colors
- Global fonts: Choose your heading and body typefaces
- Default spacing: Set consistent padding and margin values
This matters because Elementor AI inherits these settings. If your globals are messy, your AI output will be messy too [5].
Step 2: Create a new page and choose your approach
Open a new page in Elementor. You have two paths:
- Full page generation (Angie): Type a complete page description in the Angie prompt. Example: “Create a landing page for a digital marketing agency. Include a hero section with a headline about data-driven growth, a services grid with 6 cards, client logos, testimonials, and a contact form.”
- Section-by-section (Generate with AI): Add sections one at a time using the “Generate with AI” button. This gives you more control over each piece [1].
Step 3: Write effective prompts
Good prompts include:
- What you want (section type, content topic)
- Who it’s for (target audience)
- How it should feel (tone, style direction)
- Specific constraints (number of items, color preferences, CTA text)
Bad prompt: “Make a hero section.” Good prompt: “Generate a hero section for a B2B SaaS company targeting HR managers. Use a bold headline about reducing employee turnover, a subheadline mentioning AI-powered analytics, a primary CTA button saying ‘Start Free Trial,’ and a secondary link saying ‘Watch Demo.’ Keep the tone confident but not aggressive.”
Step 4: Review and refine the output
AI output is a first draft, not a final product. After generation:
- Check that the layout matches your brand guidelines
- Edit all copy for accuracy and brand voice
- Replace any AI-generated images with brand photography where possible
- Test responsive behavior on tablet and mobile views
- Verify that all buttons and links point to correct destinations
Step 5: Deploy to your live site
If you’re using Angie, you can deploy directly with one click [2]. For standard Elementor builds, publish through the normal WordPress workflow.
Edge case: If your site uses a caching plugin (WP Rocket, W3 Total Cache), clear your cache after deploying AI-generated pages. The new content may not appear to visitors until the cache refreshes.
For deeper WordPress customization beyond AI-generated layouts, our complete guide to WordPress theme customization covers manual techniques that complement AI workflows.
How Does Elementor AI Compare to Divi AI, 10Web, and Gutenberg?
Choosing the right AI-assisted builder depends on your budget, project complexity, and performance requirements. Here’s an honest comparison based on available 2026 data.

Comparison table
| Feature | Elementor AI | Divi AI | 10Web AI Builder | Gutenberg (native) |
|---|---|---|---|---|
| Pricing | $48/year (credit-based) | $16–24/month (unlimited) | $20/month (includes hosting) | Free (built into WordPress) |
| AI text generation | Yes | Yes | Yes | Via plugins only |
| AI image generation | Yes | Yes | Yes | Via plugins only |
| Full section generation | Yes | Yes | Yes (full site) | No |
| Agentic AI (multi-step) | Yes (Angie) | No | Limited | No |
| Context awareness | High (reads theme, plugins) | Medium (reads Divi settings) | Medium | N/A |
| Performance impact | Moderate to heavy | Moderate to heavy | Moderate (optimized hosting) | Lightweight |
| Best for | Elementor users, agencies | Divi ecosystem users | Full-site generation with hosting | Speed-focused, simple sites |
Decision rules
- Choose Elementor AI if you already use Elementor, need agentic multi-step generation, and work on client projects where speed matters more than page weight.
- Choose Divi AI if you prefer unlimited AI credits without tracking usage, and you’re already in the Divi ecosystem. The $16–24/month pricing gives you unrestricted generation.
- Choose 10Web AI Builder if you want full-site generation bundled with hosting and don’t want to manage separate hosting and builder subscriptions.
- Choose Gutenberg if page speed is your top priority and you’re comfortable with a more manual workflow. Critics point out that Elementor adds performance overhead, and switching to Gutenberg with lightweight blocks can improve Core Web Vitals significantly [10].
Performance reality check: Elementor powers over 16 million sites [9], but that popularity doesn’t erase the fact that it adds JavaScript and CSS weight to every page. After any AI-assisted build, run a PageSpeed Insights test. If scores drop below acceptable thresholds, consider lazy-loading sections or removing unused widgets.
For a broader comparison of website builders including no-code options, see our review of the 10 best drag-and-drop website builders in 2026.
What Are the Limitations and Common Mistakes When Using Elementor AI?
Elementor AI is powerful, but it has real limitations you should know about before relying on it for production work.
Limitations
- Credit-based pricing: At $48/year, you get a fixed number of AI credits. Heavy users (agencies building multiple sites per month) may burn through credits quickly. Divi AI’s unlimited model may be more cost-effective for high-volume work.
- Output quality varies: Complex prompts sometimes produce layouts that need significant manual adjustment. The AI is better at common patterns (hero sections, pricing tables) than unusual or highly custom designs.
- No offline mode: All AI processing happens on Elementor’s servers. If their API is down or slow, your workflow stops.
- Performance overhead: Every AI-generated section uses Elementor widgets, which add DOM elements and CSS. A page with 10+ AI-generated sections can become heavy [10].
- Limited dynamic content: Elementor AI generates static layouts well but struggles with dynamic content (custom post type loops, conditional displays). For complex dynamic projects, tools like JetEngine AI may be more appropriate.
Common mistakes to avoid
- Using AI output without editing: AI-generated copy often sounds generic. Always rewrite headlines, CTAs, and key messaging in your brand voice.
- Ignoring mobile responsiveness: AI generates desktop-first layouts. Always check and adjust tablet and mobile breakpoints manually.
- Skipping performance testing: Don’t assume AI-generated pages are fast. Test every page with Lighthouse or PageSpeed Insights.
- Over-prompting: Writing a 500-word prompt doesn’t produce better results. Keep prompts specific but concise (2-4 sentences per section).
- Forgetting accessibility: AI-generated sections may lack proper heading hierarchy, alt text, or ARIA labels. Run an accessibility audit after building.
If you’re interested in how AI tools are being used across the broader content creation space, our guide to AI-powered content generation tools provides useful context.
How to Integrate Figma Designs with Elementor AI for Faster Builds
One of the most significant workflow improvements in 2026 is the Figma-to-Elementor AI pipeline. According to Elementor, this approach cuts wireframing time by up to 60% and saves an average of 14 hours per client project [4].
The workflow
- Design in Figma: Create your wireframes and high-fidelity mockups using Figma’s collaborative tools.
- Export design tokens: Extract colors, typography, spacing, and component structures from your Figma file.
- Configure Elementor globals: Match your Elementor global settings to your Figma design tokens.
- Use AI to build sections: Reference your Figma designs in your Elementor AI prompts. Example: “Generate a feature section with three cards in a horizontal layout, using our primary blue (#1A73E8) as the card header background, 16px body text, and 24px card padding.”
- Refine and deploy: Adjust the AI output to match your Figma mockup pixel-for-pixel where needed, then deploy.
This workflow is especially valuable for agencies that present Figma mockups to clients for approval, then need to build the approved design quickly in WordPress.
For designers who want to improve their Figma skills before feeding designs into Elementor, our Figma for beginners guide covering UI/UX design principles is a solid starting point. And if you’re exploring AI-assisted design workflows in Figma itself, check out how to supercharge your design process with Figma AI workflow automation.
Tips for better Figma-to-Elementor results
- Use Figma’s auto layout: Sections designed with auto layout translate more cleanly to Elementor’s flexbox containers.
- Name your layers clearly: If you export design specifications, clear layer names help you write better AI prompts.
- Design with Elementor widgets in mind: Know what Elementor can build natively. Designing something that requires custom code defeats the purpose of using AI generation.
Will AI Replace WordPress Designers?
No. But it will change what designers spend their time on. Elementor’s own team stated in May 2026 that “AI will not replace web designers, but it will eliminate those who fail to adapt” [3].
Here’s what that means practically:
Tasks AI handles well (and will increasingly take over):
- Generating initial layout structures
- Writing first-draft copy
- Producing placeholder images
- Writing basic CSS
- Handling repetitive setup work across similar projects
Tasks that still require human designers:
- Brand strategy and creative direction
- User experience research and testing
- Accessibility auditing and remediation
- Complex interaction design
- Client communication and project management
- Quality assurance and final polish
The designers who thrive in 2026 and beyond are those who use AI to eliminate the boring parts of their work and spend the freed-up time on higher-value activities like strategy, testing, and client relationships.
For more on how AI is reshaping WordPress specifically, our article on advanced WordPress strategies for power users in 2026 covers automation techniques beyond just design.
Conclusion
Mastering Elementor AI: A Comprehensive Guide to Transforming WordPress Design Workflow comes down to three things: learning to write effective prompts, understanding where AI output needs human refinement, and choosing the right tool for your specific project type.
Your actionable next steps:
- This week: If you haven’t already, activate Elementor AI in your dashboard and experiment with the “Generate with AI” button on a test page. Start with simple sections (a hero, a feature grid) to learn how the AI interprets your prompts.
- This month: Build one complete client page using the AI-assisted workflow described in this guide. Track how much time you save compared to your usual process.
- This quarter: Evaluate whether Elementor AI’s credit-based pricing works for your volume. If you’re burning through credits, compare costs with Divi AI’s unlimited plan or 10Web’s bundled hosting approach.
- Ongoing: Always test performance after AI-assisted builds. Run Lighthouse audits, check mobile responsiveness manually, and edit AI-generated copy for brand voice and accuracy.
The AI tools available in Elementor today are genuinely useful, but they’re tools, not replacements for design thinking. Use them to handle the repetitive work. Spend your freed-up hours on the creative and strategic work that actually differentiates your projects.
FAQ
How much does Elementor AI cost in 2026? Elementor AI uses a credit-based system starting at $48/year. Credits are consumed each time you generate text, images, or sections. Heavy users may need to purchase additional credits or consider alternatives with unlimited plans.
Can I use Elementor AI without the Pro version? The AI features are available as an add-on to both Elementor Free and Pro, but the full range of AI capabilities (including section generation and Angie) requires an active AI subscription on top of your Elementor plan.
Is Elementor AI good for beginners? Yes. The “Generate with AI” button appears contextually throughout the editor, so beginners can generate sections and copy without understanding HTML, CSS, or design principles. However, the output still needs review and refinement [8].
Does Elementor AI affect my site’s loading speed? Elementor AI generates content using standard Elementor widgets, which carry the same performance characteristics as manually built Elementor pages. Pages with many sections and widgets will be heavier than equivalent Gutenberg builds [10].
Can Elementor AI generate entire websites? With Angie, you can generate complete multi-section pages from a single prompt. Generating an entire multi-page website still requires page-by-page generation, though Angie maintains design consistency across pages by reading your global settings [3].
How does Elementor AI handle multilingual content? Elementor AI can generate text in multiple languages if you specify the language in your prompt. However, it works best in English. For other languages, treat the output as a rough draft and have a native speaker review it.
What happens if I run out of AI credits? Your existing AI-generated content remains on your site. You simply can’t generate new AI content until you purchase more credits or your subscription renews.
Can I use Elementor AI with third-party Elementor addons? Yes. Angie uses the Model Context Protocol to read your installed plugins, including third-party Elementor addons like The Plus Addons [6]. However, AI generation primarily creates content using native Elementor widgets.
Is Elementor AI better than using ChatGPT separately? For WordPress page building, yes. Elementor AI is integrated into the editor, understands your site context, and generates actual Elementor widgets rather than just text. Using ChatGPT separately requires you to manually copy, paste, and format content.
How do I write better prompts for Elementor AI? Be specific about the section type, target audience, tone, and constraints. Include details like the number of items, specific CTA text, and color preferences. Avoid vague prompts like “make it look good.”
References
[1] Use Ai – https://elementor.com/blog/use-ai/ [2] How Use Ai Web Design Complete Guide – https://elementor.com/blog/how-use-ai-web-design-complete-guide/ [3] Ai Replace Web – https://elementor.com/blog/ai-replace-web/ [4] Ai Website 2026 Guide – https://elementor.com/blog/ai-website-2026-guide/ [5] Why Ai Website Builders Are Transforming Elementor Workflows In 2026 – https://vocal.media/futurism/why-ai-website-builders-are-transforming-elementor-workflows-in-2026 [6] March 2026 Update The Plus Addons For Elementor Is Ready For Elementor V4 – https://theplusaddons.com/blog/march-2026-update-the-plus-addons-for-elementor-is-ready-for-elementor-v4/ [8] Watch – https://www.youtube.com/watch?v=sjflvEoy-1Q [9] Elementor Best WordPress Page Builder – https://themezhub.com/elementor-best-wordpress-page-builder/ [10] How Ai Powered Tools Are Changing WordPress Website Design In 2026 2 – https://skwebsketch.com.au/how-ai-powered-tools-are-changing-wordpress-website-design-in-2026-2/