Last updated: May 14, 2026
Quick Answer
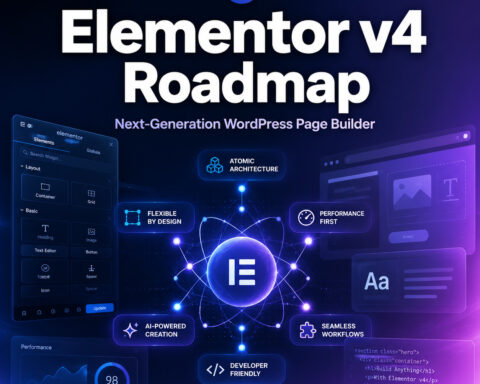
Elementor Atomic Elements are the new generation of lightweight, semantic building blocks introduced in Elementor 4.0. They replace the old widget system with lean HTML elements that produce cleaner DOM output, faster page loads, and CSS-class-based styling instead of inline styles. All new Elementor installations ship with Atomic features enabled by default; existing sites can opt in through Settings [1]. This guide covers everything you need to know about mastering Elementor Atomic Elements: the ultimate guide to modular web design starts here.
Key Takeaways
- Atomic Elements ship with Elementor 4.0 and are enabled by default on all new installations as of April 2026 [1].
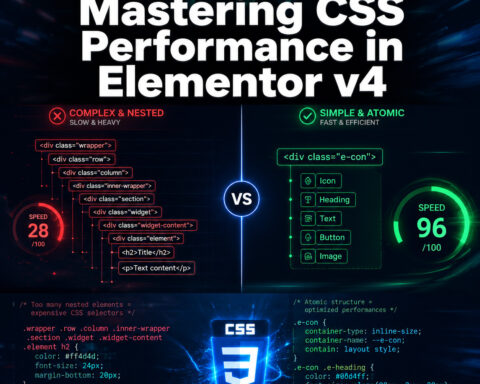
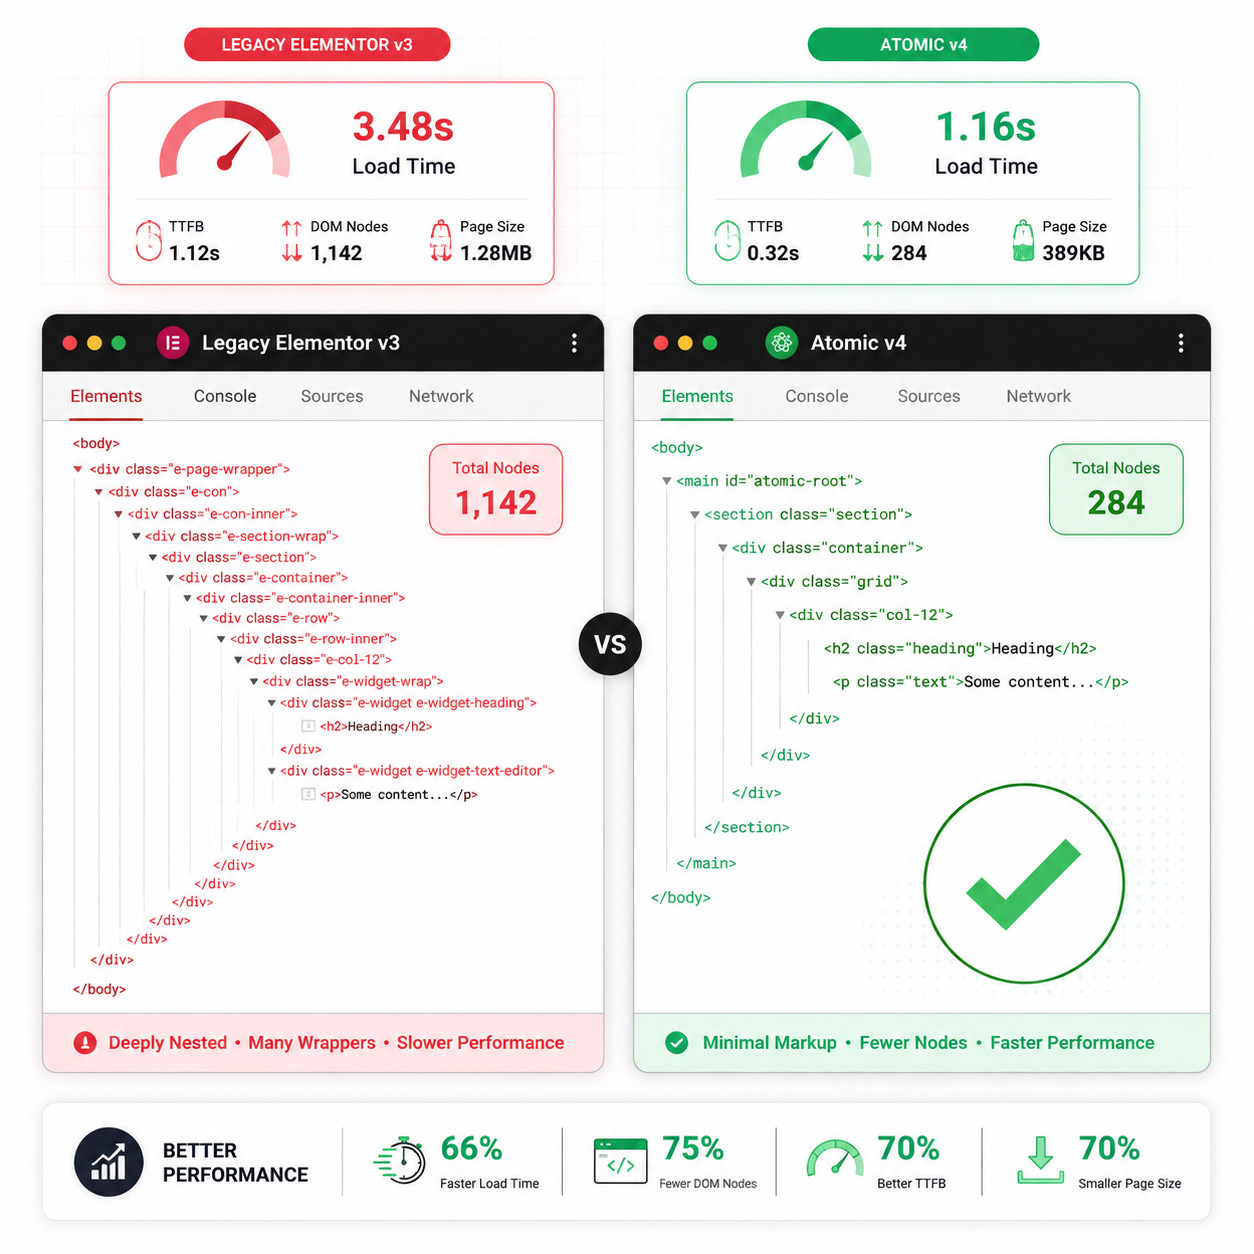
- They produce pure HTML tags without extra wrapper divs, directly reducing DOM bloat that plagued Elementor v3 [5].
- Styling shifts from inline CSS to Global Classes and Variables, making site-wide design changes possible from a single edit.
- Components (built with Atomic Elements) replace the old “Save as Global Widget” workflow, letting you lock design while keeping content editable [8].
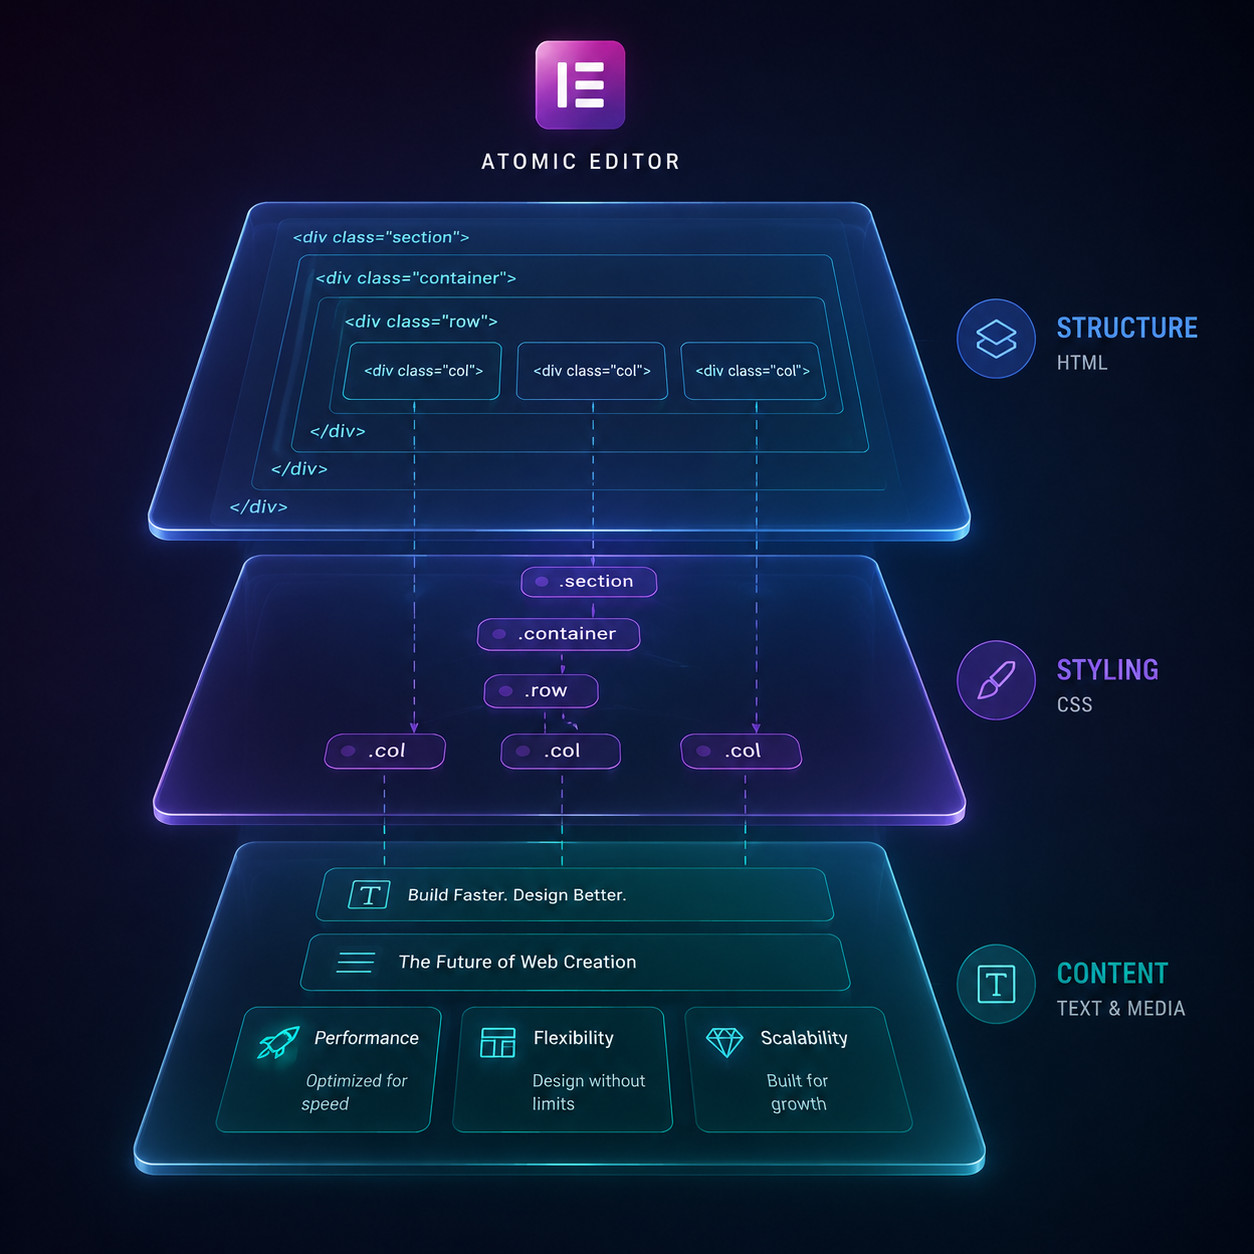
- The Atomic Editor separates your work into three distinct layers: structure, styling, and content [5].
- Existing sites with legacy widgets can run a hybrid workflow, mixing old widgets and new Atomic Elements during migration [8].
- Third-party ecosystem support is growing fast, with tools like Uichemy already adding Elementor v4 Atomic compatibility.
- The migration path for large legacy sites is still a pain point, and agencies should plan carefully before switching [4].
- Atomic Elements include flexbox containers, headings, paragraphs, images, buttons, videos, tabs, and more [8].
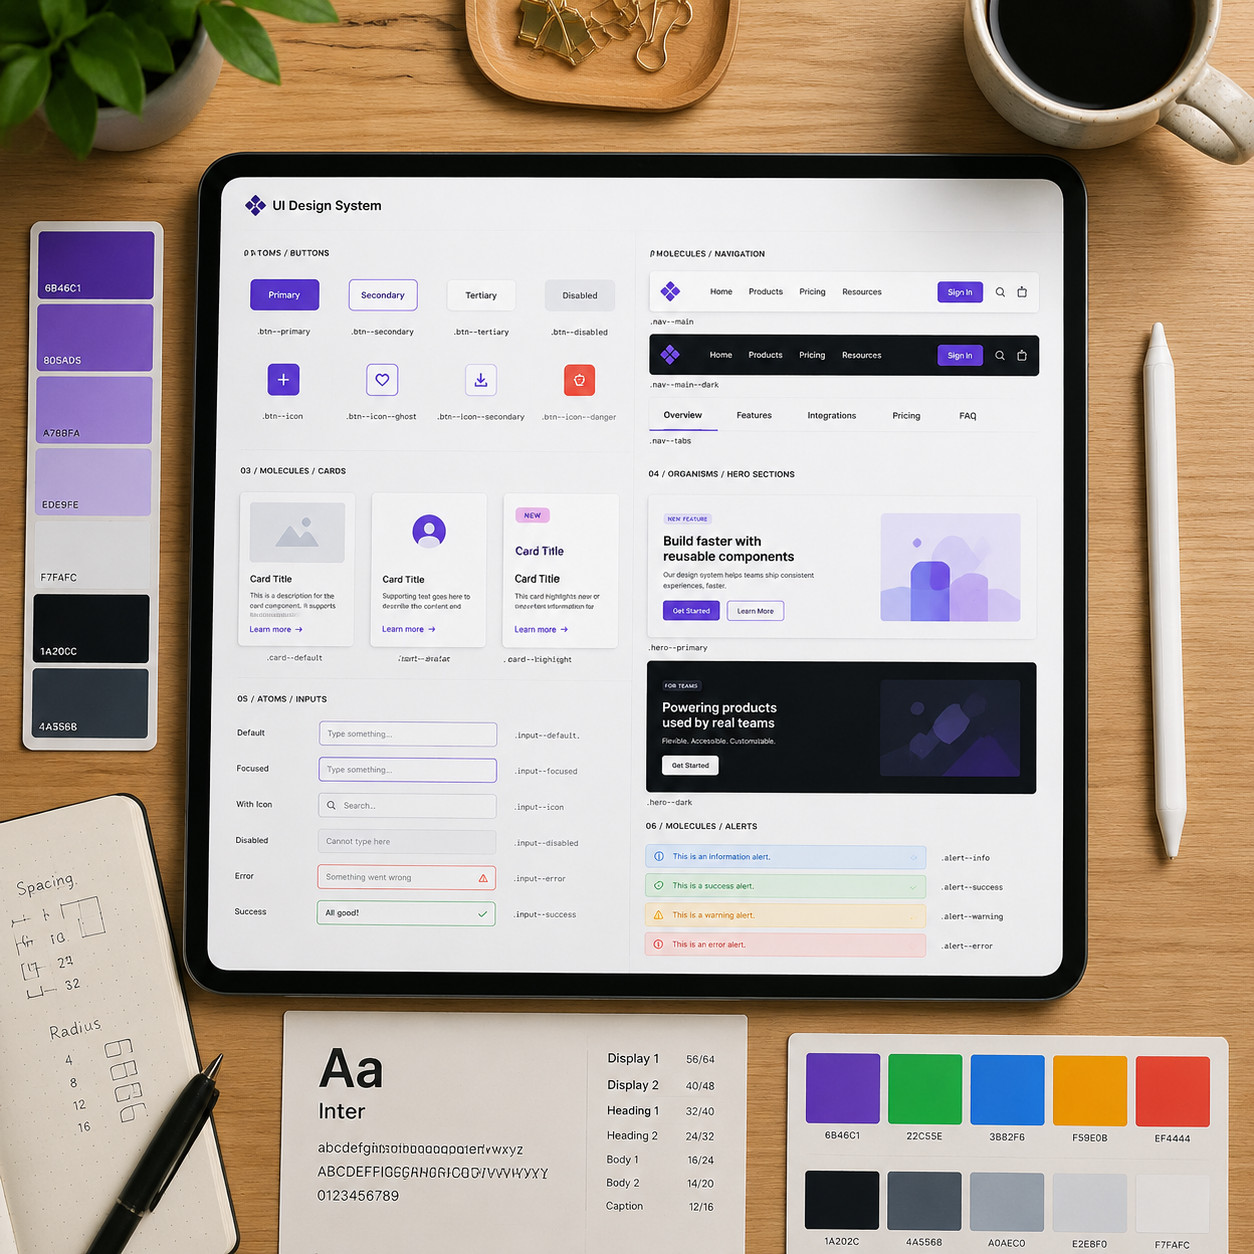
- Understanding atomic design methodology (atoms, molecules, organisms) is key to getting the most from this system.
What Are Elementor Atomic Elements and Why Do They Matter?
Atomic Elements are Elementor’s replacement for the legacy widget system. Instead of heavy widgets wrapped in multiple nested divs, each Atomic Element renders as a single, semantic HTML tag with no unnecessary wrappers [5].
This matters for three reasons:
- Performance: Fewer DOM nodes means the browser has less work to do. Pages render faster, and Core Web Vitals scores improve.
- Maintainability: CSS-class-based styling replaces inline styles. Change one class, and every element using it updates instantly.
- Scalability: The separation of structure, styling, and content makes it practical to manage sites with hundreds of pages without losing consistency.
Elementor’s own market data backs up the strategic importance of this shift. With over 16 million active installations and a 9.6% CMS market share, Elementor positioned the Atomic foundation as essential to staying competitive in 2026’s page-builder landscape [1].
The name “Atomic” comes from atomic design methodology, a concept popularized by Brad Frost. The idea is simple: build small, reusable pieces (atoms) that combine into larger components (molecules and organisms). Elementor adapted this concept for WordPress, and the result is a system where every element is a clean, composable building block.
If you’re working on custom WordPress theme development, understanding Atomic Elements is now essential because they fundamentally change how Elementor generates markup.
How Does the Atomic Editor Separate Structure, Styling, and Content?
The Atomic Editor enforces a three-layer architecture that keeps your design organized and predictable [5]. Here’s how each layer works:
Structure Layer
Structure is handled by flexbox-based containers. These are lean div elements that control layout direction, alignment, gap, and wrapping. Unlike the old section/column system, flexbox containers nest freely without generating extra wrapper markup.
Choose flexbox containers when:
- You need responsive layouts that reflow naturally on mobile
- You want to nest layouts without worrying about DOM depth
- You’re building card grids, hero sections, or any multi-element layout
Styling Layer
Styling uses Global Classes and CSS Variables instead of per-element inline styles. This is the biggest workflow change from v3.
| Feature | Elementor v3 (Legacy) | Elementor v4 (Atomic) |
|---|---|---|
| Styling method | Inline CSS on each widget | Global CSS Classes |
| Site-wide color change | Edit every widget manually | Update one Variable |
| Typography consistency | Copy/paste styles | Apply a shared Class |
| DOM output | Multiple wrapper divs | Single semantic tag |
| Reusable design tokens | Limited (Global Colors/Fonts) | Full Variables system |
A common mistake here: applying custom styles directly to an element instead of creating a reusable class. This defeats the purpose of the atomic system. Always ask yourself, “Will I use this style again?” If yes, make it a class.
Content Layer
Content sits on top of structure and styling. Text, images, and media are editable fields within Atomic Elements. When you build a Component (more on that below), you can lock the structure and styling while leaving content fields open for editing. This is how agencies maintain brand consistency across client sites.
This layered approach aligns well with design system principles used in tools like Figma, where tokens, components, and content are also kept separate.
How to Enable and Set Up Atomic Elements on Your Site
For new Elementor installations in 2026, Atomic Elements are enabled by default [1]. If you’re on an existing site, here’s the step-by-step process:
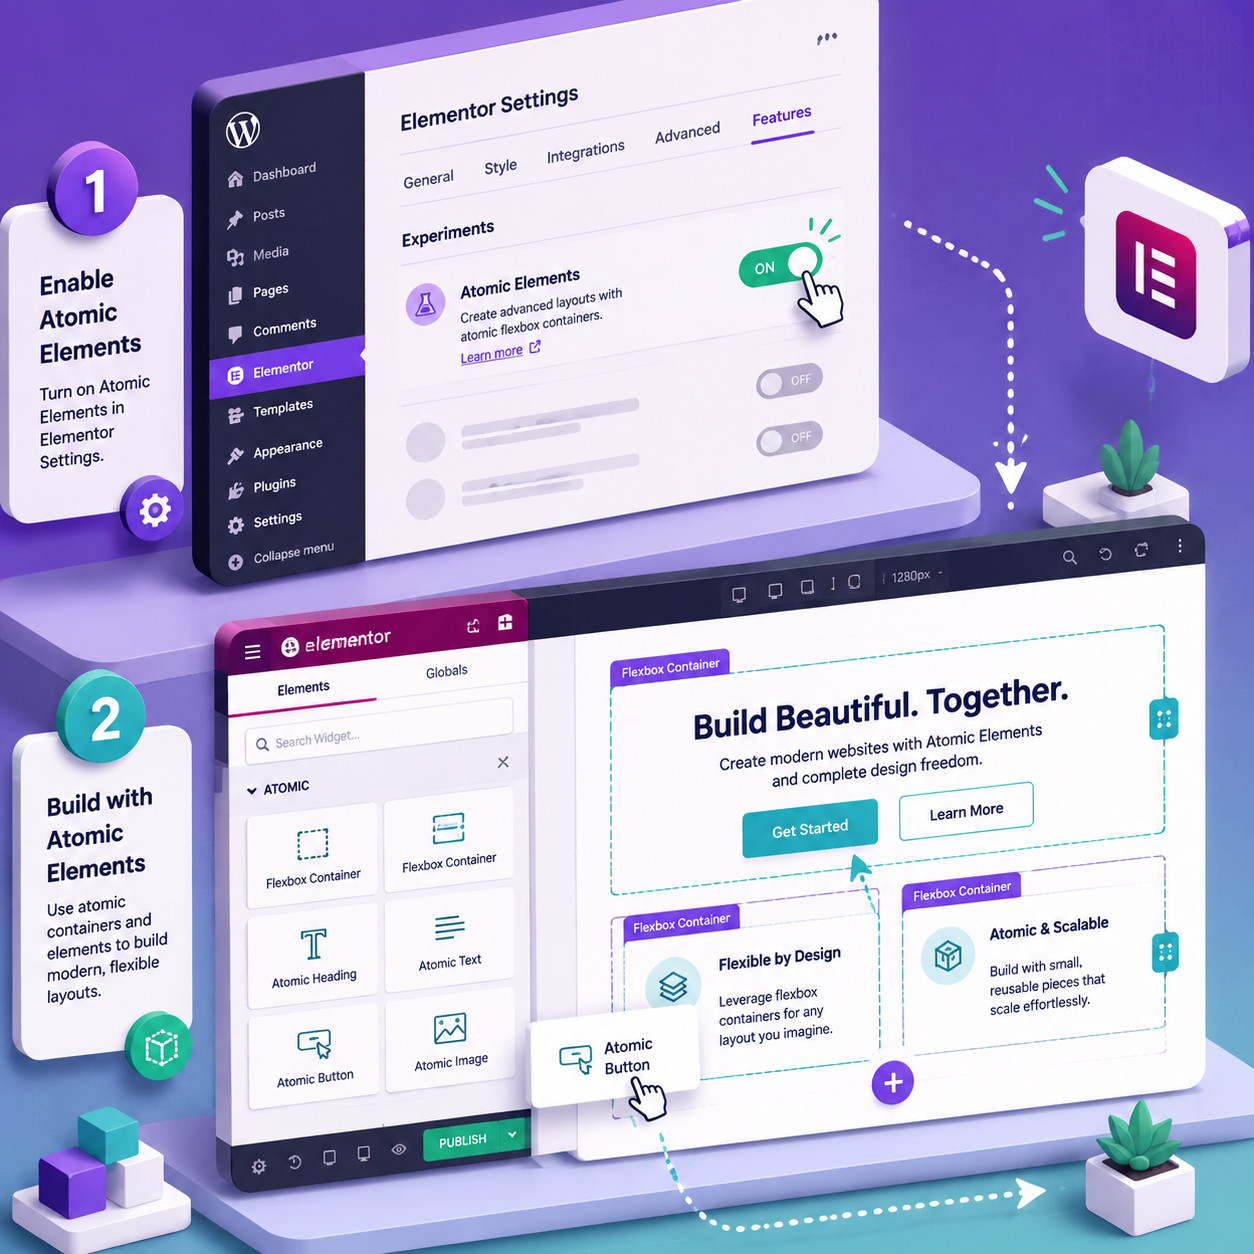
Step-by-Step Activation
- Update Elementor to version 4.0 or later.
- Navigate to Elementor → Editor → Settings in your WordPress dashboard.
- Find the Atomic Editor toggle and enable it [1].
- Save your settings and open the Elementor editor on any page.
- You’ll now see Atomic Elements (flexbox, heading, paragraph, image, button, video, tabs) in the element panel alongside legacy widgets [8].
Recommended Setup Checklist
- Back up your site before enabling (always)
- Enable Atomic Editor in Settings
- Create your base Global Classes (heading styles, body text, button styles)
- Define CSS Variables for brand colors, spacing units, and font sizes
- Build your first Component (start with a simple card or CTA block)
- Test on a staging site before applying to production pages
The Hybrid Workflow
Elementor 4.0 supports a hybrid approach where legacy widgets and Atomic Elements coexist on the same page [8]. This is critical for agencies managing large portfolios. You don’t need to rebuild everything at once.
Choose the hybrid approach if:
- You have more than 20 pages built with legacy widgets
- Your site uses third-party Elementor addons that haven’t updated yet
- You want to adopt Atomic Elements gradually, starting with new pages
Go fully atomic if:
- You’re starting a brand-new site
- Performance optimization is a top priority
- You want the cleanest possible codebase
For those evaluating whether Elementor is the right tool at all, our roundup of the best no-coding website design platforms for 2026 covers alternatives worth considering.
What Are Components and How Do They Replace Global Widgets?
Components are reusable design blocks built from Atomic Elements. They replace the old “Save as Global Widget” workflow and are significantly more powerful [8].
Here’s the key difference: a Global Widget in v3 was an all-or-nothing copy. Change one instance, and every instance changed, including the content. Components in v4 separate what’s locked (design) from what’s editable (content).
How Components Work
- Build a block using Atomic Elements (for example, a testimonial card with an image, name, quote, and star rating).
- Save it as a Component.
- Define which fields are editable (the quote text, the person’s name, the image) and which are locked (the layout, spacing, typography classes).
- Place the Component on any page. Each instance can have unique content but shares the same design.
- Update the design once by editing the Component source. Every instance across your site updates automatically.
Practical Example
Say you have a pricing card used on 12 pages. With the old system, changing the button color meant either editing all 12 instances manually or accepting that a Global Widget change would also overwrite your custom pricing text on each page.
With Components:
- The button’s color comes from a Global Class
- Change that class once, and all 12 cards update
- Each card keeps its own price, feature list, and CTA text
This workflow is similar to how Figma components and design systems handle overrides, and designers transitioning from Figma to Elementor will find the mental model familiar.
Mastering Elementor Atomic Elements: The Ultimate Guide to Modular Web Design Workflow
Building a full modular design system in Elementor v4 follows a clear sequence. Here’s the workflow I recommend based on how Atomic Elements are designed to work together.
Phase 1: Define Your Design Tokens
Start with CSS Variables for:
- Colors: primary, secondary, accent, neutral shades, error/success states
- Typography: font families, sizes (use a modular scale like 1.25), line heights, weights
- Spacing: a consistent scale (4px, 8px, 16px, 24px, 32px, 48px, 64px)
- Border radius: small, medium, large
- Shadows: subtle, medium, dramatic
Phase 2: Build Global Classes
Create classes that reference your Variables:
.heading-xl— uses your largest font size Variable, primary color.body-text— standard paragraph styling.btn-primary— primary button with brand color, padding, radius.btn-secondary— outline variant.card-container— standard card padding, background, shadow
Phase 3: Assemble Components
Combine Atomic Elements and Global Classes into Components:
- Navigation bar
- Hero section
- Feature card
- Testimonial block
- Pricing table
- Footer
- CTA banner
Phase 4: Build Pages from Components
At this point, page building becomes assembly. Drag Components onto the canvas, fill in the content fields, and you’re done. New pages take minutes instead of hours.
Phase 5: Maintain and Iterate
When the client wants a brand refresh:
- Update the CSS Variables (colors, fonts)
- Adjust Global Classes if needed
- Every page updates automatically
This is the promise of modular web design, and Elementor 4.0 finally delivers the tooling to make it work within WordPress.
If you’re also working with WordPress theme customization, the Atomic system complements theme-level styles rather than fighting them.
What Are the Common Mistakes and Pitfalls to Avoid?
The Atomic Editor is powerful, but the transition has real friction points. Here are the mistakes I see most often and how to avoid them.
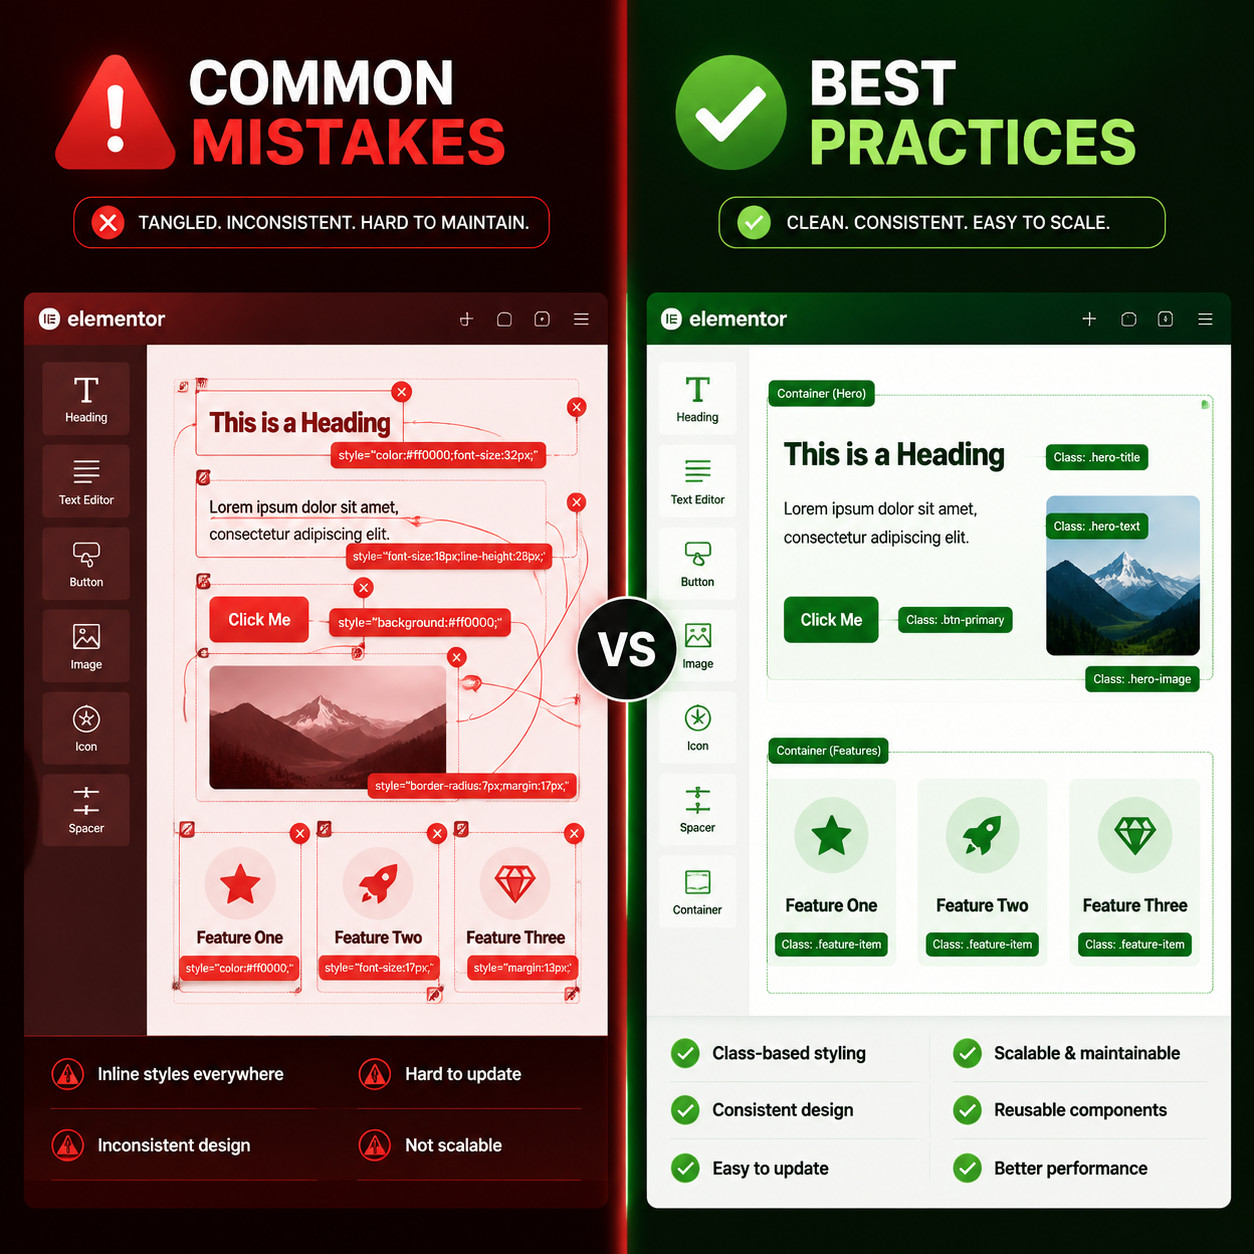
Mistake 1: Using Inline Styles Instead of Classes
Old habits die hard. Many Elementor users instinctively style elements through the panel’s style tab, which applies inline CSS. In the Atomic system, this creates inconsistency and defeats the purpose of class-based styling.
Fix: Before styling anything, ask: “Does a class for this already exist?” If not, create one.
Mistake 2: Migrating a Large Legacy Site All at Once
A widely discussed Reddit thread highlighted that agencies with large v3 portfolios face real challenges when switching to Atomic [4]. The migration path isn’t one-click, and some third-party addons may not yet support v4 markup.
Fix: Use the hybrid workflow. Migrate page by page, starting with high-traffic templates. Test thoroughly on staging.
Mistake 3: Creating Too Many One-Off Components
If every section on your site is a unique Component, you’ve just recreated the old widget problem with extra steps.
Fix: Aim for 15-25 core Components that cover 80% of your layout needs. Use content overrides for variation, not new Components.
Mistake 4: Ignoring the Variable System
Some users create Global Classes with hardcoded values instead of referencing Variables. This means a brand color change still requires editing multiple classes.
Fix: Always define colors, fonts, and spacing as Variables first, then reference them in your Classes.
Mistake 5: Not Testing Third-Party Addon Compatibility
Not all Elementor addons have updated for v4 Atomic markup. Using incompatible addons can produce broken layouts or unexpected DOM output.
Fix: Check addon changelogs for v4 compatibility notes before enabling Atomic on production. Tools like Uichemy have already announced support, but verify each addon individually.
For broader guidance on building WordPress sites that perform well, see our WordPress plugin development best practices.
How Does the Atomic Editor Affect SEO and Performance?
The performance gains from Atomic Elements directly impact SEO. Cleaner DOM output means faster rendering, which improves Core Web Vitals scores, particularly Largest Contentful Paint (LCP) and Cumulative Layout Shift (CLS).
Performance Benefits
- Reduced DOM size: Fewer wrapper divs means fewer nodes for the browser to parse. On complex pages, this can cut DOM node count significantly [5].
- Smaller CSS payload: Class-based styling generates shared CSS rules instead of per-element inline declarations. The stylesheet is smaller and more cacheable.
- Faster Time to Interactive: Less JavaScript overhead because Atomic Elements rely on native HTML/CSS behavior rather than widget initialization scripts.
References
[1] Editor 40 Atomic Forms Pro Interactions – https://elementor.com/blog/editor-40-atomic-forms-pro-interactions/ [2] Atomic Form Element – https://elementor.com/help/atomic-form-element/ [4] Elementor Teams Approach To V4 Is Fundamentally – https://www.reddit.com/r/elementor/comments/1t6wfwc/elementor_teams_approach_to_v4_is_fundamentally/ [5] Elementor Version 4 The Atomic Editor – https://essential-addons.com/elementor-version-4-the-atomic-editor/ [6] Everything You Need To Know About Elementor 4 0 In 2025 – https://invernessdesignstudio.com/everything-you-need-to-know-about-elementor-4-0-in-2025 [8] Watch – https://www.youtube.com/watch?v=JVO918h_ip0